| |
| 原著者 | Anastasia Murzova |
| 互換性 | OpenCV >= 4.5 |
目標
このチュートリアルでは、以下の方法を学ぶ:
- TensorFlow(TF)の分類モデルの凍結グラフ(frozen graph)を取得する
- 変換したTensorFlowモデルをOpenCVのPython APIで実行する
- TensorFlowモデルとOpenCV DNNモデルの評価を行う
上記の項目を、MobileNetアーキテクチャを例として探っていく。
はじめに
OpenCV APIを用いたTensorFlowモデル移行のパイプラインに関わる主要な概念を簡単に見ておこう。TensorFlowモデルを cv.dnn.Net に変換する最初のステップは、凍結された(frozen)TFモデルグラフを取得することである。凍結グラフは、モデルのグラフ構造と、必要な変数(例えば重み)の保持された値との組み合わせを定義する。通常、凍結グラフは protobuf(.pb)ファイルとして保存される。モデルの .pb ファイルが生成された後、cv.dnn.readNetFromTensorflow 関数で読み込むことができる。
必要要件
以下のコードを試せるようにするには、一連のライブラリをインストールする必要がある。ここではpython3.7+の仮想環境を使う。
virtualenv -p /usr/bin/python3.7 <env_dir_path>
source <env_dir_path>/bin/activate
OpenCV-Pythonをソースからビルドする場合は、OpenCV入門 の該当する手順に従うこと。
ライブラリのインストールを始める前に、いくつかの依存関係を除外したり含めたり(例えば opencv-python)して requirements.txt をカスタマイズできる。以下の行で、事前に有効化した仮想環境への要件のインストールを開始する:
pip install -r requirements.txt
実践
この章では、以下の点を扱う。
- TF分類モデルの変換パイプラインを作成し、推論を提供する
- TF分類モデルを評価しテストする
単に評価やモデルパイプラインのテストを実行したいだけであれば、「Model Conversion Pipeline」のチュートリアル部分は省略してもよい。
モデル変換パイプライン
本節のコードは dnn_model_runner モジュール内にあり、次の行で実行できる:
python -m dnn_model_runner.dnn_conversion.tf.classification.py_to_py_mobilenet
以下のコードには、下に列挙する各ステップの説明が含まれている:
- TFモデルをインスタンス化する
- TFのfrozen graphを作成する
- OpenCV APIでTFのfrozen graphを読み込む
- 入力データを準備する
- 推論を実行する
original_tf_model = MobileNet(
include_top=True,
weights="imagenet"
)
full_pb_path = get_tf_model_proto(original_tf_model)
opencv_net = cv2.dnn.readNetFromTensorflow(full_pb_path)
print("OpenCV model was successfully read. Model layers: \n", opencv_net.getLayerNames())
input_img = get_preprocessed_img("../data/squirrel_cls.jpg")
imagenet_labels = get_imagenet_labels("../data/dnn/classification_classes_ILSVRC2012.txt")
get_opencv_dnn_prediction(opencv_net, input_img, imagenet_labels)
get_tf_dnn_prediction(original_tf_model, input_img, imagenet_labels)
モデル推論を行うために、ImageNetのクラスID 335に対応する、以下のリスの写真(CC0ライセンス)を使用する:
fox squirrel, eastern fox squirrel, Sciurus niger
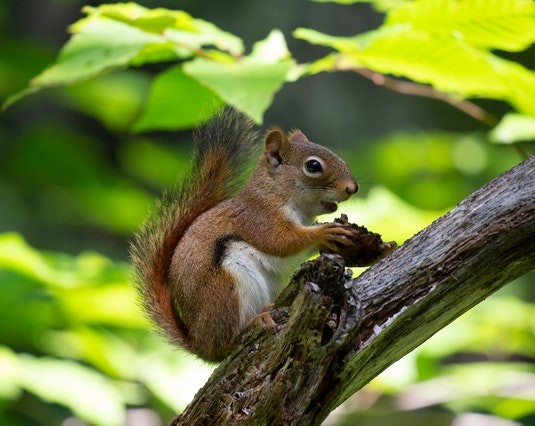
Classification model input image
得られた予測のラベルをデコードするために、ImageNetクラスの完全な一覧を含む imagenet_classes.txt ファイルも必要となる。
学習済みのTF MobileNetを例として、各ステップをより詳しく見ていこう:
original_tf_model = MobileNet(
include_top=True,
weights="imagenet"
)
pb_model_path = "models"
pb_model_name = "mobilenet.pb"
os.makedirs(pb_model_path, exist_ok=True)
tf_model_graph = tf.function(lambda x: tf_model(x))
tf_model_graph = tf_model_graph.get_concrete_function(
tf.TensorSpec(tf_model.inputs[0].shape, tf_model.inputs[0].dtype))
frozen_tf_func = convert_variables_to_constants_v2(tf_model_graph)
frozen_tf_func.graph.as_graph_def()
tf.io.write_graph(graph_or_graph_def=frozen_tf_func.graph,
logdir=pb_model_path,
name=pb_model_name,
as_text=False)
上記のコードが正常に実行されると、models/mobilenet.pb にfrozen graphが得られる。
full_pb_path = get_tf_model_proto(original_tf_model)
- cv2.dnn.blobFromImage 関数で入力データを準備する:
input_img = cv2.imread(img_path, cv2.IMREAD_COLOR)
input_img = input_img.astype(np.float32)
mean = np.array([1.0, 1.0, 1.0]) * 127.5
scale = 1 / 127.5
input_blob = cv2.dnn.blobFromImage(
image=input_img,
scalefactor=scale,
size=(224, 224),
mean=mean,
swapRB=True,
crop=True
)
print("Input blob shape: {}\n".format(input_blob.shape))
cv2.dnn.blobFromImage 関数における前処理の順序に注意してほしい。まず平均値が減算され、その後にのみピクセル値が指定したスケールで乗算される。したがって、TFの mobilenet.preprocess_input 関数の画像前処理パイプラインを再現するために、mean に 127.5 を乗算している。
その結果、4次元の input_blob が得られた:
Input blob shape: (1, 3, 224, 224)
opencv_net.setInput(preproc_img)
out = opencv_net.forward()
print("OpenCV DNN prediction: \n")
print("* shape: ", out.shape)
imagenet_class_id = np.argmax(out)
confidence = out[0][imagenet_class_id]
print("* class ID: {}, label: {}".format(imagenet_class_id, imagenet_labels[imagenet_class_id]))
print("* confidence: {:.4f}\n".format(confidence))
上記のコードを実行すると、次の出力が得られる:
OpenCV DNN prediction:
* shape: (1, 1000)
* class ID: 335, label: fox squirrel, eastern fox squirrel, Sciurus niger
* confidence: 0.9525
preproc_img = preproc_img.transpose(0, 2, 3, 1)
print("TF input blob shape: {}\n".format(preproc_img.shape))
out = original_net(preproc_img)
print("\nTensorFlow model prediction: \n")
print("* shape: ", out.shape)
imagenet_class_id = np.argmax(out)
print("* class ID: {}, label: {}".format(imagenet_class_id, imagenet_labels[imagenet_class_id]))
confidence = out[0][imagenet_class_id]
print("* confidence: {:.4f}".format(confidence))
TFモデルの入力に合わせるため、input_blob を転置した:
TF input blob shape: (1, 224, 224, 3)
TFの推論結果は次のとおりである:
TensorFlow model prediction:
* shape: (1, 1000)
* class ID: 335, label: fox squirrel, eastern fox squirrel, Sciurus niger
* confidence: 0.9525
実験からわかるように、OpenCVとTFの推論結果は一致している。
モデルの評価
dnn/samples で提供される dnn_model_runner モジュールを使うと、ImageNetデータセット上で完全な評価パイプラインを実行し、次のTensorFlow分類モデルについてテスト実行を行える:
- vgg16
- vgg19
- resnet50
- resnet101
- resnet152
- densenet121
- densenet169
- densenet201
- inceptionresnetv2
- inceptionv3
- mobilenet
- mobilenetv2
- nasnetlarge
- nasnetmobile
- xception
この一覧は、適切な評価パイプライン設定を追加することでさらに拡張できる。
評価モード
以下の行は、評価モードでモジュールを実行する例を表す:
python -m dnn_model_runner.dnn_conversion.tf.classification.py_to_py_cls --model_name <tf_cls_model_name>
一覧から選択された分類モデルが、OpenCVの cv.dnn_Net オブジェクトに読み込まれる。TFモデルとOpenCVモデルの評価結果(精度、推論時間、L1)がログファイルに書き込まれる。推論時間の値は、得られたモデル情報を一般化するためのチャートにも図示される。
必要な評価設定は test_config.py で定義されており、データの場所の実際のパスに合わせて変更できる::
@dataclass
class TestClsConfig:
batch_size: int = 50
frame_size: int = 224
img_root_dir: str = "./ILSVRC2012_img_val"
img_cls_file: str = "./val.txt"
bgr_to_rgb: bool = True
TestClsConfig の値は、選択したモデルに合わせてカスタマイズできる。
TensorFlow MobileNetの評価を開始するには、次の行を実行する:
python -m dnn_model_runner.dnn_conversion.tf.classification.py_to_py_cls --model_name mobilenet
スクリプトの起動後、評価データを含むログファイルが dnn_model_runner/dnn_conversion/logs に生成される:
===== Running evaluation of the model with the following params:
* val data location: ./ILSVRC2012_img_val
* log file location: dnn_model_runner/dnn_conversion/logs/TF_mobilenet_log.txt
テストモード
以下の行は、テストモードでモジュールを実行する例を表す。すなわち、モデル推論のためのステップを提供する:
python -m dnn_model_runner.dnn_conversion.tf.classification.py_to_py_cls --model_name <tf_cls_model_name> --test True --default_img_preprocess <True/False> --evaluate False
ここで default_img_preprocess キーは、scale、mean、std などの特定の値でモデルのテスト処理をパラメータ化するか、デフォルト値を使用するかを定義する。
テスト設定は test_config.py の TestClsModuleConfig クラスに表される:
@dataclass
class TestClsModuleConfig:
cls_test_data_dir: str = "../data"
test_module_name: str = "classification"
test_module_path: str = "classification.py"
input_img: str = os.path.join(cls_test_data_dir, "squirrel_cls.jpg")
model: str = ""
frame_height: str = str(TestClsConfig.frame_size)
frame_width: str = str(TestClsConfig.frame_size)
scale: str = "1.0"
mean: List[str] = field(default_factory=lambda: ["0.0", "0.0", "0.0"])
std: List[str] = field(default_factory=list)
crop: str = "False"
rgb: str = "True"
rsz_height: str = ""
rsz_width: str = ""
classes: str = os.path.join(cls_test_data_dir, "dnn", "classification_classes_ILSVRC2012.txt")
デフォルトの画像前処理オプションは default_preprocess_config.py で定義されている。例えばMobileNetの場合:
tf_input_blob = {
"mean": ["127.5", "127.5", "127.5"],
"scale": str(1 / 127.5),
"std": [],
"crop": "True",
"rgb": "True"
}
モデルテストの基盤は samples/dnn/classification.py に表される。classification.py は、変換済みモデルを --input に指定し、cv.dnn.blobFromImage のパラメータを設定すれば、単独で実行できる。
「Model Conversion Pipeline」で説明したOpenCVのステップを、dnn_model_runner を使って一から再現するには、以下の行を実行する:
python -m dnn_model_runner.dnn_conversion.tf.classification.py_to_py_cls --model_name mobilenet --test True --default_img_preprocess True --evaluate False
ネットワークの予測は、出力ウィンドウの左上隅に図示される:
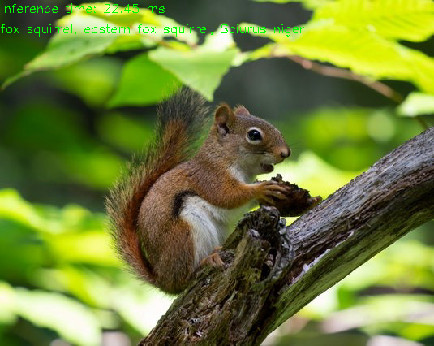
TF MobileNet OpenCV inference output