このチュートリアルでは、'dnn_superres' インターフェースを使って、事前学習済みニューラルネットワークによって画像を拡大する方法を学ぶ。C++とPythonで動作する。
ビルド
OpenCVをビルドする際、contribモジュールをすべてビルドするには次のコマンドを実行する。
cmake -D OPENCV_EXTRA_MODULES_PATH=<opencv_contrib>/modules/
または dnn_superres モジュールのみをビルドする。
cmake -D OPENCV_EXTRA_MODULES_PATH=<opencv_contrib>/modules/dnn_superres
または、CMakeのGUI版である cmake-gui で dnn_superres モジュールにチェックが入っていることを確認する。
サンプルのソースコード
次のようにしてサンプルコードを実行できる。
<path_of_your_opencv_build_directory>/bin/example_dnn_superres_dnn_superres <path_to_image.png> <algo_string> <upscale_int> <model_path.pb>
例:
/home/opencv/build/bin/example_dnn_superres_dnn_superres /home/image.png edsr 2 /home/EDSR_x2.pb
15using namespace dnn_superres;
17int main(
int argc,
char *argv[])
22 cout <<
"usage: Arg 1: image | Path to image" << endl;
23 cout <<
"\t Arg 2: algorithm | bilinear, bicubic, edsr, espcn, fsrcnn or lapsrn" << endl;
24 cout <<
"\t Arg 3: scale | 2, 3 or 4 \n";
25 cout <<
"\t Arg 4: path to model file \n";
29 string img_path = string(argv[1]);
30 string algorithm = string(argv[2]);
31 int scale = atoi(argv[3]);
35 path = string(argv[4]);
39 Mat original_img(img);
42 std::cerr <<
"Couldn't load image: " << img <<
"\n";
51 if( algorithm ==
"bilinear" ){
52 resize(img, img_new,
Size(), scale, scale, 2);
54 else if( algorithm ==
"bicubic" )
56 resize(img, img_new,
Size(), scale, scale, 3);
58 else if( algorithm ==
"edsr" || algorithm ==
"espcn" || algorithm ==
"fsrcnn" || algorithm ==
"lapsrn" )
61 sr.setModel(algorithm, scale);
62 sr.upsample(img, img_new);
65 std::cerr <<
"Algorithm not recognized. \n";
68 if ( img_new.
empty() )
70 std::cerr <<
"Upsampling failed. \n";
73 cout <<
"Upsampling succeeded. \n";
Comma-separated Matrix Initializer.
Definition mat.hpp:964
bool empty() const
Returns true if the array has no elements.
Template class for specifying the size of an image or rectangle.
Definition types.hpp:338
void imshow(const String &winname, InputArray mat)
Displays an image in the specified window.
int waitKey(int delay=0)
Waits for a pressed key.
void namedWindow(const String &winname, int flags=WINDOW_AUTOSIZE)
Creates a window.
Mat imread(const String &filename, int flags=IMREAD_COLOR_BGR)
Loads an image from a file.
int main(int argc, char *argv[])
Definition highgui_qt.cpp:3
解説
ヘッダと名前空間を設定する
using namespace dnn;
using namespace dnn_superres;
必要であれば、上記のコードのように名前空間を設定できる。
Dnn Superresオブジェクトを作成する
これは単にオブジェクトを作成し、カスタムのdnnレイヤーを登録し、クラスの関数にアクセスできるようにするためのものである。
モデルを読み込む
path = "models/FSRCNN_x2.pb"
sr.readModel(path);
これは .pb ファイルからTensorFlowモデルを読み込む。ここで 'path' は事前学習済みTensorFlowモデルのいずれかのパスファイルである。モデルはOpenCVのGitHubの 'dnn_superres' モジュールからダウンロードできる。
モデルを設定する
sr.setModel("fsrcnn", 2);
実行したいモデルに応じて、アルゴリズムと拡大率を設定する必要がある。これは、.pb ファイルの名前を変更しても、目的のアルゴリズムとスケールを知るためである。たとえば、FSRCNN_x2.pb を選んだ場合、アルゴリズムとスケールはそれぞれ 'fsrcnn' と 2 になる。(その他のアルゴリズムの選択肢には "edsr"、"espcn"、"lapsrn" がある。)
画像を拡大する
sr.upsample(img, img_new);
これで任意の画像を拡大できる。標準の 'imread' 関数で画像を読み込み、出力画像用に新しいMatを作成する。あとは単純に拡大するだけである。拡大された画像は 'img_new' に格納される。
Pythonでの例
import cv2
from cv2 import dnn_superres
sr = dnn_superres.DnnSuperResImpl_create()
image = cv2.imread('./image.png')
path = "EDSR_x4.pb"
sr.readModel(path)
sr.setModel("edsr", 4)
result = sr.upsample(image)
cv2.imwrite("./upscaled.png", result)
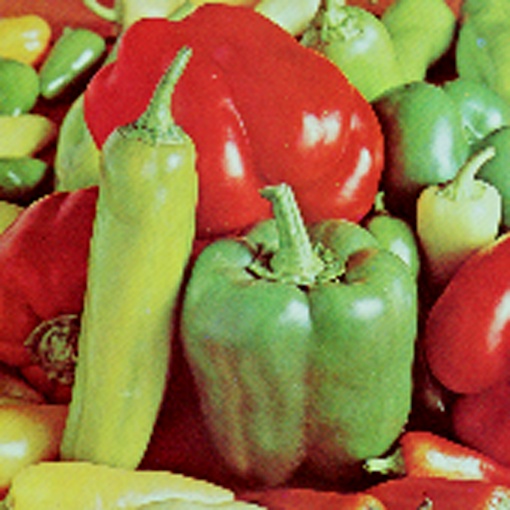
元画像:
FSRCNNによる拡大画像:
バイキュービック補間による拡大画像: