前のチュートリアル: カスタムOCRモデルの実行方法
次のチュートリアル: PyTorch分類モデルの変換とOpenCV C++での実行
| |
| 原著者 | Anastasia Murzova |
| 互換性 | OpenCV >= 4.5 |
目標
このチュートリアルでは、以下の方法を学ぶ:
- PyTorch分類モデルをONNX形式に変換する
- 変換したPyTorchモデルをOpenCV Python APIで実行する
- PyTorchモデルとOpenCV DNNモデルの評価を取得する。
上記の項目を ResNet-50 アーキテクチャの例を通して解説する。
はじめに
OpenCV APIを用いたPyTorchモデル移行のパイプラインに関わる主要な概念を簡単に見ていく。PyTorchモデルを cv.dnn.Net へ変換する最初のステップは、モデルを ONNX 形式へ移すことである。ONNX はさまざまなフレームワーク間でのニューラルネットワークの相互運用性を目指している。PyTorch には ONNX 変換用の組み込み関数 torch.onnx.export がある。さらに、得られた .onnx モデルは cv.dnn.readNetFromONNX に渡される。
要件
以下のコードを試せるようにするには、一連のライブラリをインストールする必要がある。ここではpython3.7+の仮想環境を使う。
virtualenv -p /usr/bin/python3.7 <env_dir_path>
source <env_dir_path>/bin/activate
OpenCV-Pythonをソースからビルドする場合は、OpenCV入門 の該当する手順に従うこと。
ライブラリのインストールを始める前に、requirements.txt をカスタマイズし、一部の依存関係を除外したり(たとえば opencv-python を)含めたりできる。以下の行は、先に有効化した仮想環境への要件のインストールを開始する。
pip install -r requirements.txt
実践
この章では、以下の点を扱う。
- 分類モデルの変換パイプラインを作成し、推論を行う
- 分類モデルを評価しテストする
評価またはテストのモデルパイプラインを実行するだけであれば、「モデル変換パイプライン」の部分は省略できる。
モデル変換パイプライン
本節のコードは dnn_model_runner モジュール内にあり、次の行で実行できる:
python -m dnn_model_runner.dnn_conversion.pytorch.classification.py_to_py_resnet50
以下のコードには、下に列挙する各ステップの説明が含まれている:
- PyTorchモデルをインスタンス化する
- PyTorchモデルを
.onnxへ変換する
- OpenCV APIで変換したネットワークを読み込む
- 入力データを準備する
- 推論を実行する
original_model = models.resnet50(pretrained=True)
full_model_path = get_pytorch_onnx_model(original_model)
opencv_net = cv2.dnn.readNetFromONNX(full_model_path)
print("OpenCV model was successfully read. Layer IDs: \n", opencv_net.getLayerNames())
input_img = get_preprocessed_img("../data/squirrel_cls.jpg")
imagenet_labels = get_imagenet_labels("../data/dnn/classification_classes_ILSVRC2012.txt")
get_opencv_dnn_prediction(opencv_net, input_img, imagenet_labels)
get_pytorch_dnn_prediction(original_model, input_img, imagenet_labels)
モデル推論を行うために、ImageNetのクラスID 335に対応する、以下のリスの写真(CC0ライセンス)を使用する:
fox squirrel, eastern fox squirrel, Sciurus niger
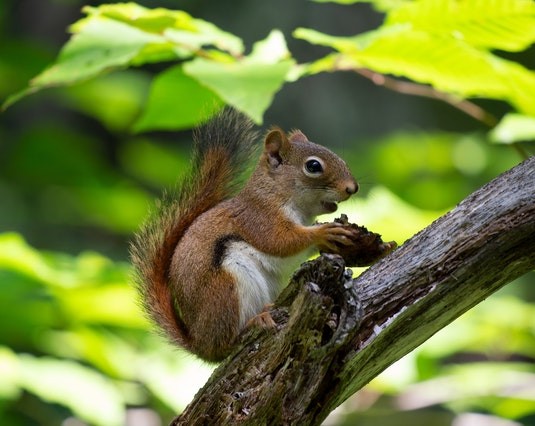
Classification model input image
得られた予測のラベルをデコードするために、ImageNetクラスの完全な一覧を含む imagenet_classes.txt ファイルも必要となる。
学習済みのPyTorch ResNet-50 を例に、各ステップをより詳しく見ていく:
- PyTorch ResNet-50 モデルをインスタンス化する:
original_model = models.resnet50(pretrained=True)
onnx_model_path = "models"
onnx_model_name = "resnet50.onnx"
os.makedirs(onnx_model_path, exist_ok=True)
full_model_path = os.path.join(onnx_model_path, onnx_model_name)
generated_input = Variable(
torch.randn(1, 3, 224, 224)
)
torch.onnx.export(
original_model,
generated_input,
full_model_path,
verbose=True,
input_names=["input"],
output_names=["output"],
opset_version=11
)
上記コードの実行が成功すると、models/resnet50.onnx が得られる。
opencv_net = cv2.dnn.readNetFromONNX(full_model_path)
input_img = cv2.imread(img_path, cv2.IMREAD_COLOR)
input_img = input_img.astype(np.float32)
input_img = cv2.resize(input_img, (256, 256))
mean = np.array([0.485, 0.456, 0.406]) * 255.0
scale = 1 / 255.0
std = [0.229, 0.224, 0.225]
input_blob = cv2.dnn.blobFromImage(
image=input_img,
scalefactor=scale,
size=(224, 224),
mean=mean,
swapRB=True,
crop=True
)
input_blob[0] /= np.asarray(std, dtype=np.float32).reshape(3, 1, 1)
このステップでは画像を読み込み、4次元のblobを返す cv.dnn.blobFromImage 関数でモデル入力を準備する。cv.dnn.blobFromImage では、まず平均値が減算され、その後にピクセル値がスケールで乗算される点に注意すること。したがって、元の画像前処理の順序を再現するため、mean には 255.0 が乗算される:
img /= 255.0
img -= [0.485, 0.456, 0.406]
img /= [0.229, 0.224, 0.225]
opencv_net.setInput(preproc_img)
out = opencv_net.forward()
print("OpenCV DNN prediction: \n")
print("* shape: ", out.shape)
imagenet_class_id = np.argmax(out)
confidence = out[0][imagenet_class_id]
print("* class ID: {}, label: {}".format(imagenet_class_id, imagenet_labels[imagenet_class_id]))
print("* confidence: {:.4f}".format(confidence))
上記のコードを実行すると、次の出力が得られる:
OpenCV DNN prediction:
* shape: (1, 1000)
* class ID: 335, label: fox squirrel, eastern fox squirrel, Sciurus niger
* confidence: 14.8308
- PyTorch ResNet-50 モデルによる推論:
original_net.eval()
preproc_img = torch.FloatTensor(preproc_img)
out = original_net(preproc_img)
print("\nPyTorch model prediction: \n")
print("* shape: ", out.shape)
imagenet_class_id = torch.argmax(out, axis=1).item()
print("* class ID: {}, label: {}".format(imagenet_class_id, imagenet_labels[imagenet_class_id]))
confidence = out[0][imagenet_class_id]
print("* confidence: {:.4f}".format(confidence.item()))
上記のコードを実行すると、次の出力が得られる:
PyTorch model prediction:
* shape: torch.Size([1, 1000])
* class ID: 335, label: fox squirrel, eastern fox squirrel, Sciurus niger
* confidence: 14.8308
元の ResNet-50 モデルと cv.dnn.Net の推論結果は等しい。モデルをさらに詳しく評価するには、dnn_model_runner モジュールの py_to_py_cls を利用できる。このモジュール部分については次の節で説明する。
モデルの評価
samples/dnn で提供される dnn_model_runner モジュールを使うと、ImageNet データセット上で完全な評価パイプラインを実行し、次のPyTorch分類モデルのテスト実行を行える:
- alexnet
- vgg11
- vgg13
- vgg16
- vgg19
- resnet18
- resnet34
- resnet50
- resnet101
- resnet152
- squeezenet1_0
- squeezenet1_1
- resnext50_32x4d
- resnext101_32x8d
- wide_resnet50_2
- wide_resnet101_2
この一覧は、適切な評価パイプライン設定を追加することでさらに拡張できる。
評価モード
以下の行は、モジュールを評価モードで実行する例である:
python -m dnn_model_runner.dnn_conversion.pytorch.classification.py_to_py_cls --model_name <pytorch_cls_model_name>
一覧から選択した分類モデルが OpenCV cv.dnn.Net オブジェクトに読み込まれる。PyTorchモデルとOpenCVモデルの評価結果(精度、推論時間、L1)はログファイルに書き出される。推論時間の値はチャートにも描画され、得られたモデル情報を一般化して示す。
必要な評価設定は test_config.py で定義されており、実際のデータ配置パスに合わせて変更できる:
@dataclass
class TestClsConfig:
batch_size: int = 50
frame_size: int = 224
img_root_dir: str = "./ILSVRC2012_img_val"
img_cls_file: str = "./val.txt"
bgr_to_rgb: bool = True
PyTorch ResNet-50 の評価を開始するには、次の行を実行する:
python -m dnn_model_runner.dnn_conversion.pytorch.classification.py_to_py_cls --model_name resnet50
スクリプトの起動後、評価データを含むログファイルが dnn_model_runner/dnn_conversion/logs に生成される:
The model PyTorch resnet50 was successfully obtained and converted to OpenCV DNN resnet50
===== Running evaluation of the model with the following params:
* val data location: ./ILSVRC2012_img_val
* log file location: dnn_model_runner/dnn_conversion/logs/PyTorch_resnet50_log.txt
テストモード
以下の行は、テストモードでモジュールを実行する例を表す。すなわち、モデル推論のためのステップを提供する:
python -m dnn_model_runner.dnn_conversion.pytorch.classification.py_to_py_cls --model_name <pytorch_cls_model_name> --test True --default_img_preprocess <True/False> --evaluate False
ここで default_img_preprocess キーは、scale、mean、std などの特定の値でモデルのテスト処理をパラメータ化するか、デフォルト値を使用するかを定義する。
テスト設定は test_config.py の TestClsModuleConfig クラスで表される:
@dataclass
class TestClsModuleConfig:
cls_test_data_dir: str = "../data"
test_module_name: str = "classification"
test_module_path: str = "classification.py"
input_img: str = os.path.join(cls_test_data_dir, "squirrel_cls.jpg")
model: str = ""
frame_height: str = str(TestClsConfig.frame_size)
frame_width: str = str(TestClsConfig.frame_size)
scale: str = "1.0"
mean: List[str] = field(default_factory=lambda: ["0.0", "0.0", "0.0"])
std: List[str] = field(default_factory=list)
crop: str = "False"
rgb: str = "True"
rsz_height: str = ""
rsz_width: str = ""
classes: str = os.path.join(cls_test_data_dir, "dnn", "classification_classes_ILSVRC2012.txt")
既定の画像前処理オプションは default_preprocess_config.py で定義されている。たとえば:
BASE_IMG_SCALE_FACTOR = 1 / 255.0
PYTORCH_RSZ_HEIGHT = 256
PYTORCH_RSZ_WIDTH = 256
pytorch_resize_input_blob = {
"mean": ["123.675", "116.28", "103.53"],
"scale": str(BASE_IMG_SCALE_FACTOR),
"std": ["0.229", "0.224", "0.225"],
"crop": "True",
"rgb": "True",
"rsz_height": str(PYTORCH_RSZ_HEIGHT),
"rsz_width": str(PYTORCH_RSZ_WIDTH)
}
モデルテストの基礎は samples/dnn/classification.py で表される。classification.py は、--input に変換済みモデルを指定し、cv.dnn.blobFromImage 用の引数を設定すれば、単独で実行できる。
「Model Conversion Pipeline」で説明したOpenCVのステップを、dnn_model_runner を使って一から再現するには、以下の行を実行する:
python -m dnn_model_runner.dnn_conversion.pytorch.classification.py_to_py_cls --model_name resnet50 --test True --default_img_preprocess True --evaluate False
ネットワークの予測は、出力ウィンドウの左上隅に図示される:

ResNet50 OpenCV inference output